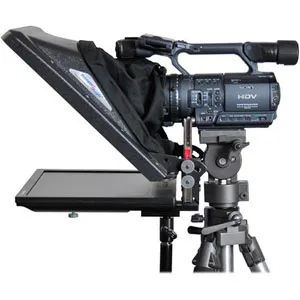
 Whether you are recording for live TV or doing a screencast show for the web, teleprompters can help you narrate lengthy pieces of text in a flawless manner without you having to memorize anything. You can look confidently at the camera and read as words from the script smoothly scroll upwards on your computer screen.
Professional speakers and TV anchors and often use a hardware-based teleprompter where the monitor displaying the text is attached to the video camera itself and reflected to the speaker using a mirror, here we’ll look at building a simple software based teleprompter using a presentation software that you probably already have – Microsoft PowerPoint.
Before we get into the implementation details, here’s a video demo of how your finished PowerPoint based teleprompter will look like:
Make a Teleprompter with PowerPoint
I have written this tutorial for Microsoft Office 2010 but the steps are similar if you are using Office 2007 or a previous version.
Step 1: Create a new presentation in PowerPoint and set the layout as Blank. Switch to the design tab and choose Black as the background style.
Step 2. Create a new text box such that it expands to the entire width of the slide. Copy-paste the transcript inside this text box and change the font size of the text as per requirements. I use Calibri at 48 points with single line spacing.
Step 3. Now comes the interesting part. Switch to the Animations Tab in PowerPoint and, while the text box is selected, add the Lines animation that is found under motion path. Then go to Effect Options and set “Up” as the direction for Animation.
Step 4. Open the Animations pane and double-click the TextBox object to open the Effect options dialog. Set the Smooth Start and Smooth End timing to 0 seconds. From the Timing tab, set the duration of the animation to 50 seconds.
Step 5. Next reduce the zoom to around 20% such that the entire animation and the slide is visible. Move the red tip of the animation arrow above the top edge the slide as shown in the next screenshot.
[gallery link=“file”]
That’s it. Press F5 to play the slideshow and that’s your new teleprompter. You may play around with the timing and the arrow positions depending upon the amount of text. Also, you may split text into multiple slides if it extends longer than a minute.
Also, this teleprompter is just like a regular PowerPoint presentation and hence you may use your wireless mouse to move across slides even from a distance.


