 Google Translate, Windows Live Translator and Yahoo! Babelfish have made it very easy for web publishers to add language translation capability into their web pages. Include a line of Javascript code anywhere in your blog template and visitors from other countries will be able to translate and read your content in their own native language. Simple.
While these solutions work, the only problem is that when people translate your web pages, everything gets reloaded under a different URL and this is not the best user experience. You may therefore want to try this AJAX based language translation where the content is translated inline in real-time while the visitor remains on your site.
Inline Translation powered by Google AJAX Language API
Watch this screencast video to see how inline translation works or go here for a live demo.
There are many advantages offered by Google AJAX Language Translation API vis-a-vis the regular online translation service of Google. You are in complete control of page elements that are to be translated, all existing links and sharing features on your web page stay intact and best of all, visitors get a better experience.
If you liked what you just saw, it is something very easy to implement and internally uses Google API that you may use on any site without any restrictions.
How Inline Language Translation Works ?
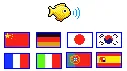
The basic idea is that when a visitors clicks a language flag or selects a new language from the drop down, we invoke the Google Translate API and replace (actually hide) the existing text with the translated text returned by the Google API. The cycle is repeated when another languages is selected.
Your visitors can also switch to the original language of the web page anytime.
Add Google AJAX Language API in your Website
If you are ready to take the plunge, here’s what you need to do to get this working on your site.
Step 1: Edit your blog template and place everything that you want to translate inside a <div> tag with some unique id. - let’s say <div id="article">....</div>

Step 2: Now place this code - <div id="translation"></div> - near the article div you configured in Step 1. The second div will actually house your translated text so you may add it just above or below the article div.
Step 3: And here’s the actual translation code. If this looks geeky, don’t worry too much - just copy-paste it inside the <head> tag of your blog template as it is.
<script type="text/javascript" src="http://www.google.com/jsapi"></script>
<script type="text/javascript">
  // Initialize version 1.0 of Google AJAX API
  google.load('language', '1');

  function translate(lang) {
    var source = document.getElementById('article').innerHTML;
    var len = content.length;

    // Google Language API accepts 500 characters per request
    var words = 500;

    // This is for English pages, you can change the
    // sourcelang variable for other languages
    var sourcelang = 'en';
    document.getElementById('translation').innerHTML = '';

    for (i = 0; i <= len / words; i++) {
      google.language.translate(source.substr(i * words, words), 'en', lang, function (result) {
        if (!result.error) {
          document.getElementById('translation').innerHTML =
            document.getElementById('translation').innerHTML + result.translation;
        }
      });
    }

    // Hide the text written in the original language
    document.getElementById('article').style.display = 'none';
    return false;
  }

  // Switch to the original language

  function original() {
    document.getElementById('translation').style.display = 'none';
    document.getElementById('article').style.display = 'block';
    return false;
  }
</script>
Step 4: The last step is to include the translation flags or translation drop-down menu in your template.
I prefer having language names instead of country flags because a flag may not always be the best representation of a language.
<a href="#" onclick="original();">Switch to English</a>
<select onchange="translate(this.options[this.selectedIndex].value);">
  <option value="de">deutsch</option>
  <option value="pt">português</option>
  <option value="fr">français</option>
  <option value="ja">日本語</option>
  <option value="ar">عَرَبيْ</option>
  <option value="it">italiano</option>
  <option value="ru">pусский</option>
  <option value="po">polski</option>
  <option value="zh-CN">中文</option>
  <option value="es">español</option>
  <option value="ko">한국어</option>
  <option value="nl">nederlands</option>
  <option value="hi">हिन्दी</option>
  <option value="el">Ελληνική</option>
  <option value="ro">română</option>
</select>