The File Upload feature of Google Forms lets you receive files from form respondents directly in your Google Drive. You may add the File Upload question in your Google Form to receive PDF assignments from students, job applications, portfolio images from contestants, and more.
While the file upload feature in Google Forms is handy, it does have one big limitation. For instance, when a respondent uploads a file through Google Forms, the file is stored in a fixed folder within the form owner’s Google Drive. All uploaded files are are saved to the same folder, making it difficult to determine which respondent has uploaded which set of files.
Move Uploaded Files in Google Forms
This is where Document Studio can help you. The add-on can help you automatically organize uploaded files in custom folders as soon as they are received in your Google Drive through Google Forms. You can move uploaded to another folder, or rename the files based on the respondents’ answers in the Google Form. Additionally, you can organize the uploaded files into subfolders for convenient access.
Prepare Google Form
For this example, we’ve created a Google Form for collecting job applications for different positions in our company. The candidates have to provide their full name, the position they’re applying for, and then upload their resume in PDF format.

By default, all uploaded files will be added in a new parent folder that is created by Google Forms in your Google Drive. However, you can organize the resume files in subfolders and move them to a specific folder based on the position the candidate has applied for. This will help you easily find the resumes of candidates who have applied for a specific position.
The uploaded files can also be renamed based on the candidate’s name or their email address. This will help you quickly identify the resumes of specific candidates.
Move Files to Custom Folders in Google Drive
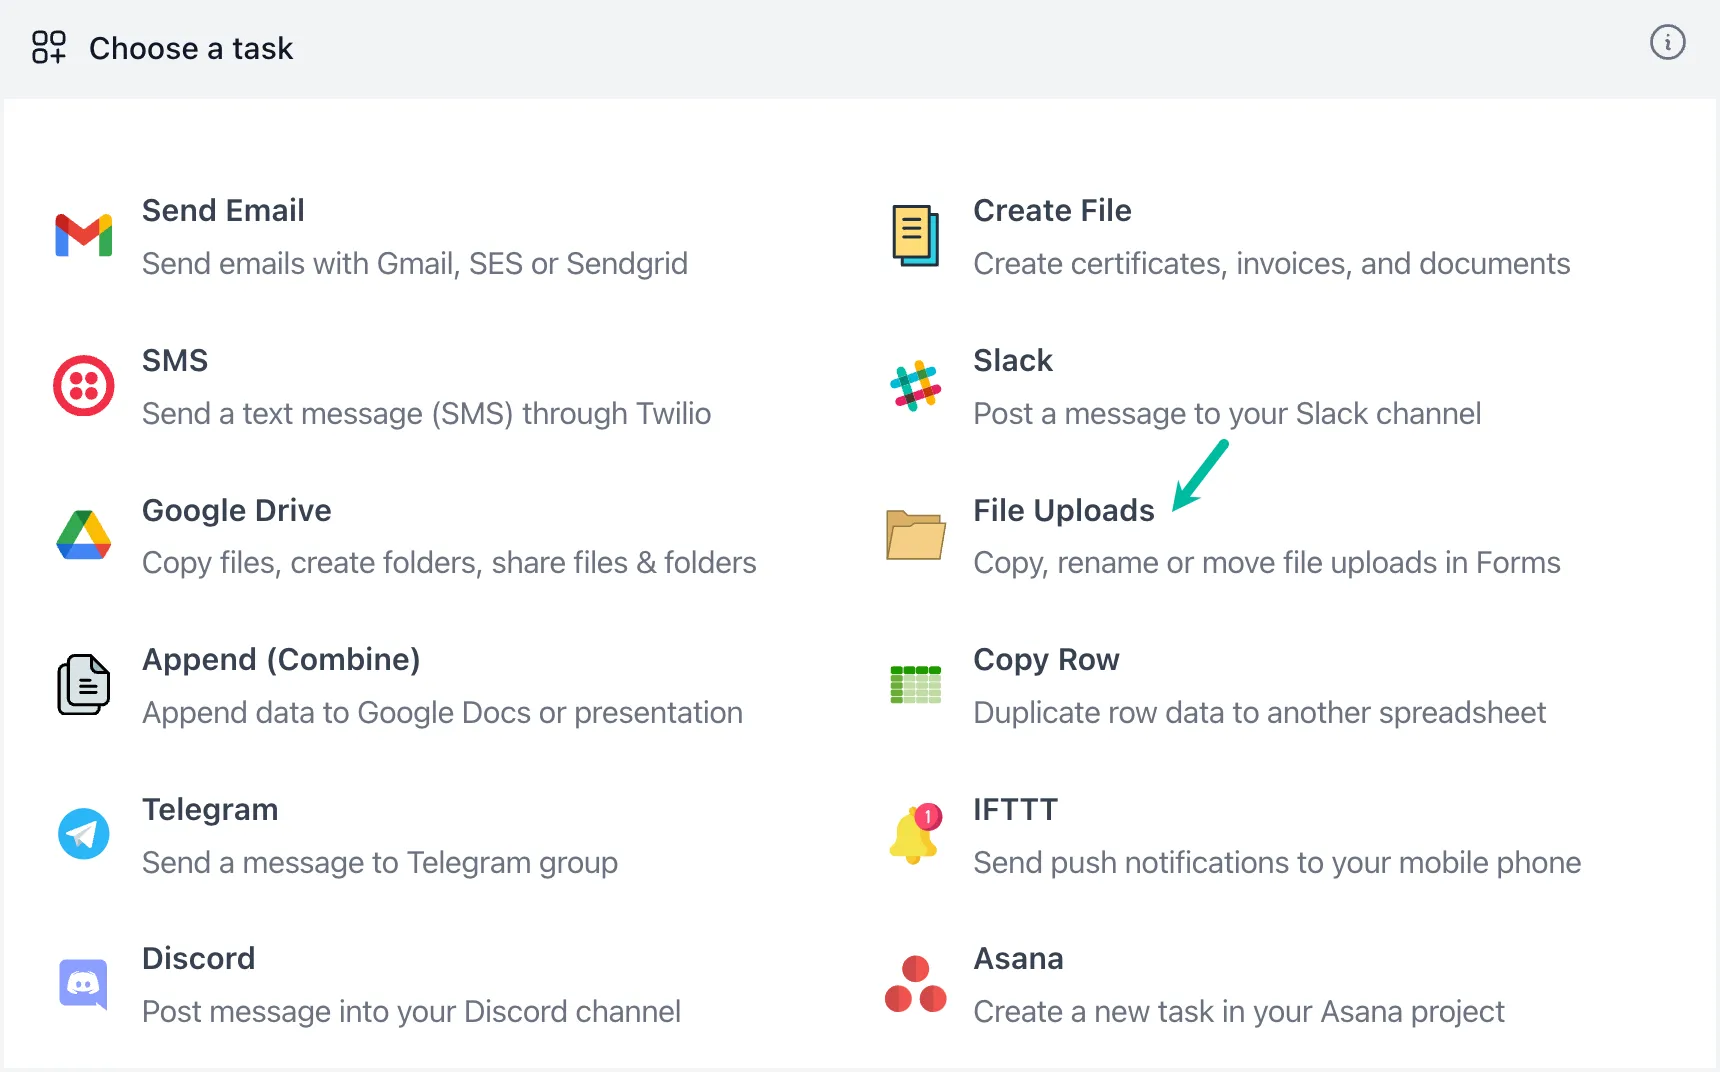
Install the Document Studio and open the add-on in your Google Form. Create a new workflow and choose the File Uploads task from the list of available tasks.
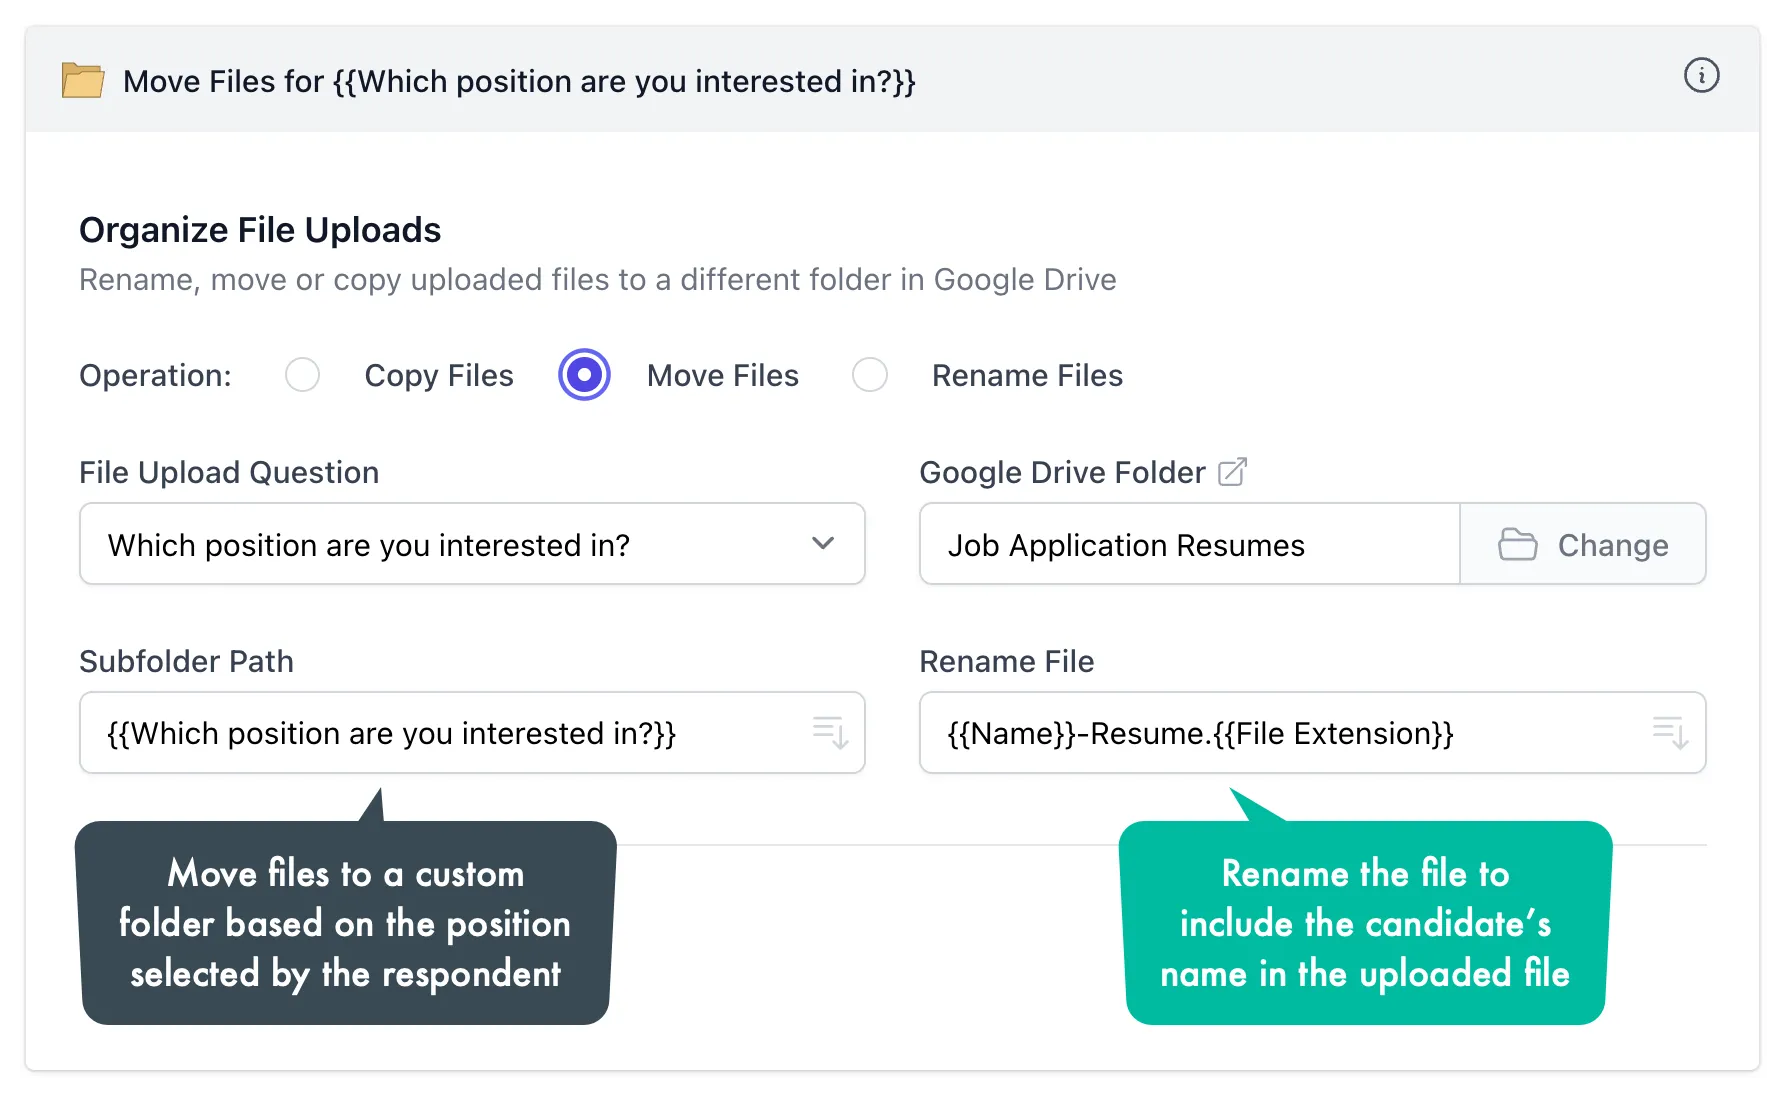
With Document Studio, you can move the uploaded files to another folder, copy the files to another folder, or rename the files based on the form responses. For our example, we’ll move and also rename the uploaded files based on the position the candidate has applied for.
Select the file upload question from the list of available questions. Next, choose the parent Google Drive folder where you wish to copy or move the uploaded files. You may also choose to save the uploaded files in a Shared Drive Folder, something that is not possible with the default Google Forms file upload feature.
For the subfolder path input field, provide the full path where you want the uploaded files to be saved. You can use placeholders like {{Country}} or {{Position}} to dynamically create subfolders based on the form responses.
Finally, provide a new name for the uploaded files. For our example, we have used the {{Name}} placeholder to rename the uploaded files based on the candidate’s name provided in the Google Form.
Save the workflow and your automation is ready. Now, whenever a candidate uploads their resume through your Google Form, the uploaded file will be moved to a custom folder in your Google Drive. The file will also be renamed based on the candidate’s name.
Move File Uploads with Google Apps Script
If you are comfortable with Google Apps Script, you can also write a custom script that will move the uploaded files to a specific folder in Google Drive. The script can be attached to your Google Form and will run automatically whenever a new form response is submitted.
To get started, go to your Google Drive and create a new folder (or use an existing folder). Open the folder and grab the ID of the folder from the browser’s address bar as shown in the screenshot.
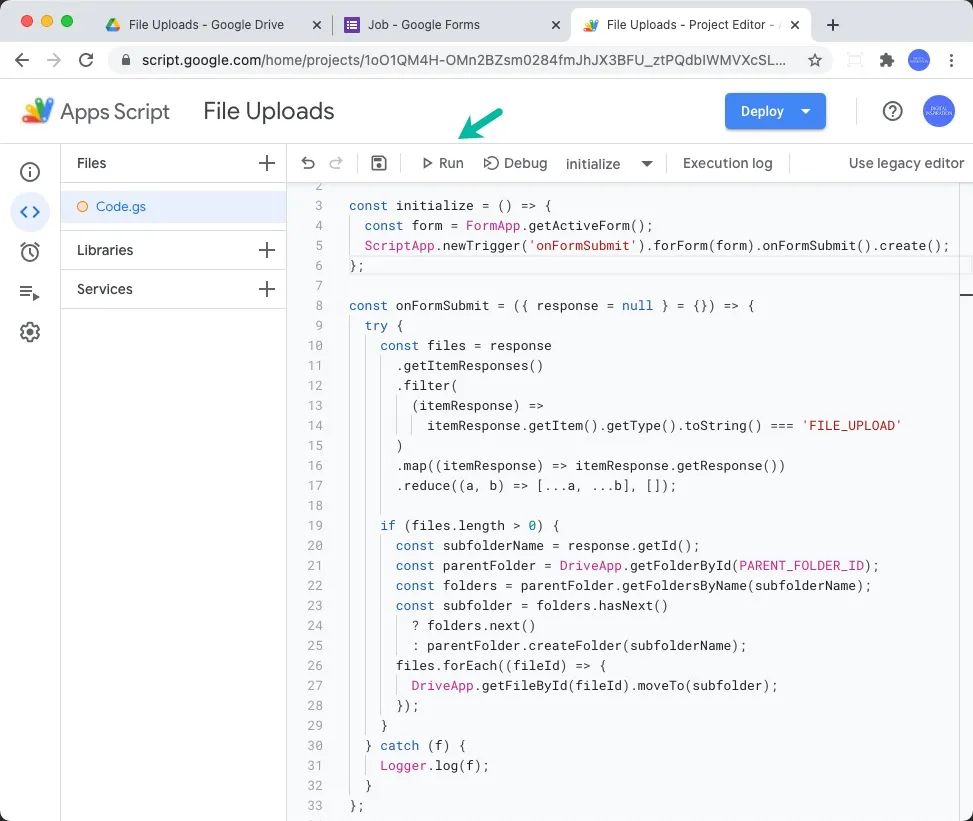
Next, go to your Google Form that is accepting File Uploads and choose Script Editor from the 3-dot menu. Inside the script editor, remove all the existing code and copy-paste the following snippet. Remember to replace the Folder Id in line #1 with the Id of the folder that you’ve created in the previous step.
const PARENT_FOLDER_ID = '<<Folder ID here>>';

const initialize = () => {
  const form = FormApp.getActiveForm();
  ScriptApp.newTrigger('onFormSubmit').forForm(form).onFormSubmit().create();
};

const onFormSubmit = ({ response } = {}) => {
  try {
    // Get a list of all files uploaded with the response
    const files = response
      .getItemResponses()
      // We are only interested in File Upload type of questions
      .filter((itemResponse) => itemResponse.getItem().getType().toString() === 'FILE_UPLOAD')
      .map((itemResponse) => itemResponse.getResponse())
      // The response includes the file ids in an array that we can flatten
      .reduce((a, b) => [...a, ...b], []);

    if (files.length > 0) {
      // Each form response has a unique Id
      const subfolderName = response.getId();
      const parentFolder = DriveApp.getFolderById(PARENT_FOLDER_ID);
      const subfolder = parentFolder.createFolder(subfolderName);
      files.forEach((fileId) => {
        // Move each file into the custom folder
        DriveApp.getFileById(fileId).moveTo(subfolder);
      });
    }
  } catch (f) {
    Logger.log(f);
  }
};
Create OnFormSubmit Trigger
Inside the script editor, select initialize from the function drop-down and click the Run button to create the OnFormSubmit trigger for your current Google Form.
This will essentially run the Apps Script code whenever someone submits a new form entry and upload files to a specific folder in Google Drive.
That’s it. Go to your Google Form and submit a new test entry. You should now see all the uploaded files neatly organized in a custom folder under the parent folder. The name of the custom folder is the unique Response Id that Google Forms automatically assigns to every form submission.
Also see: