Document Studio, by default, will merge all rows that are present in a Google Sheet except those where the Document URL column is not blank meaning the document has already been generated and would not be generated again.
If you are using Document Studio to send emails, it will also skip rows where the Email Status column is not blank meaning the emails have already gone out to the intended recipients in the row and they won’t be sent a duplicate email.
You can also use Filters in Google Sheets to merge only a set of rows in Google Sheet and not merge every single row. For instance, if you have invoice data in a Google Sheet, you can choose to process only rows where the due date is more than 100 days or where the invoice amount in more than a specific amount.
In our following example, we have a database of customer and we only wish to merge documents for customers that are in the New York City.
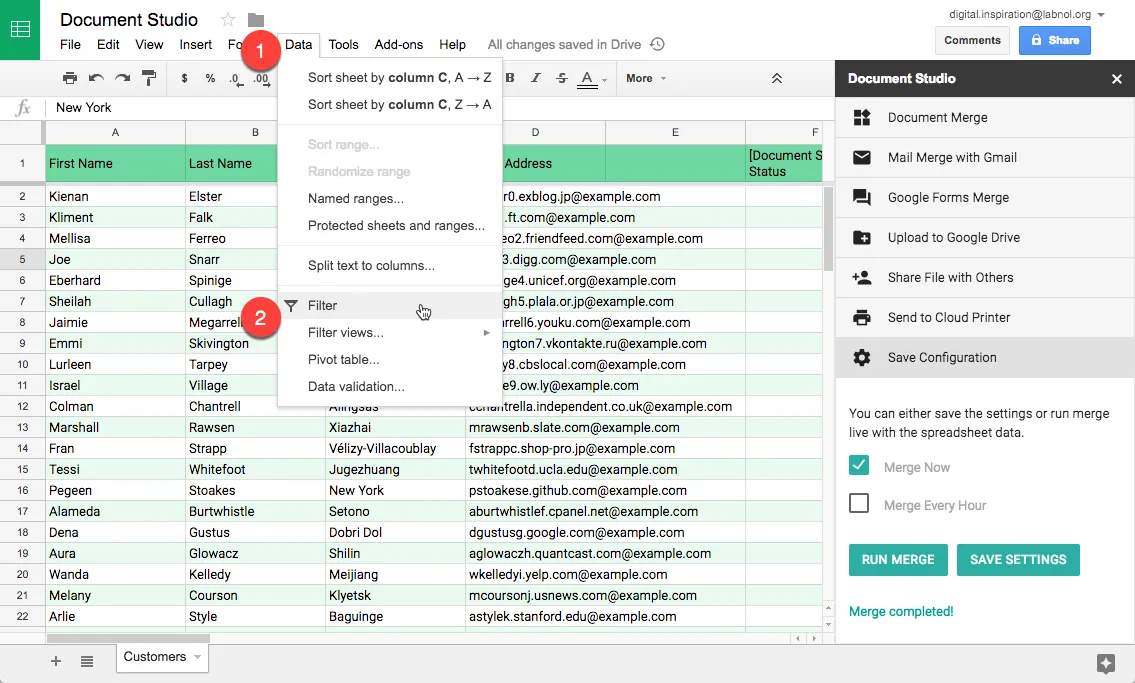
To get started, go to the Data menu in the Google Sheet and choose Filter.
Next, click the filter arrow in the City column to specify a condition. We’ll use the “Filter by Condition” and choose “Text Contains” or “Text is Exactly” filter setting the value to New York.
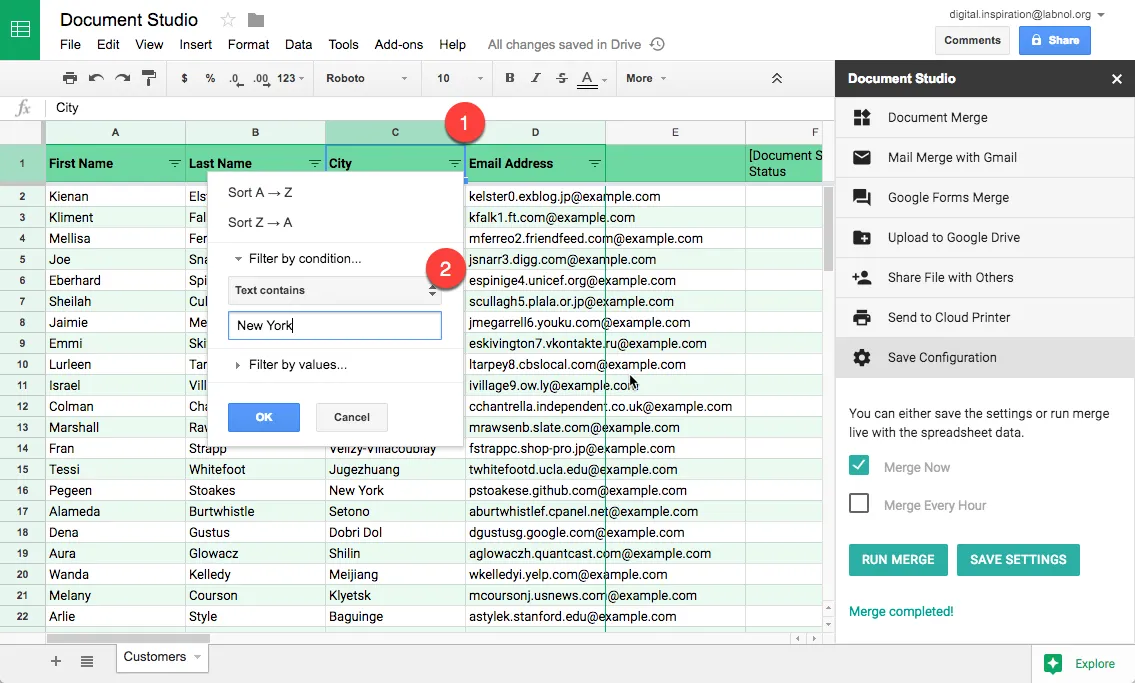
The sheet will only show filtered rows in the view. Document Studio will now only merge documents for the filtered visible rows.