This example shows how you can use Google Cloud Function to generate open graph images from Google Slides template in Google Drive. You may open any page on this website and look for the og:image meta tag in the head to see the generated image that is different for each image.
When the cloud function is invoked, the input text is provided in the query string and this replaces the {{Title}} placeholder in the template to generate the customized image. The generated image is stored in Google Cloud storage and the file’s public URL is returned.
Create a Service Account
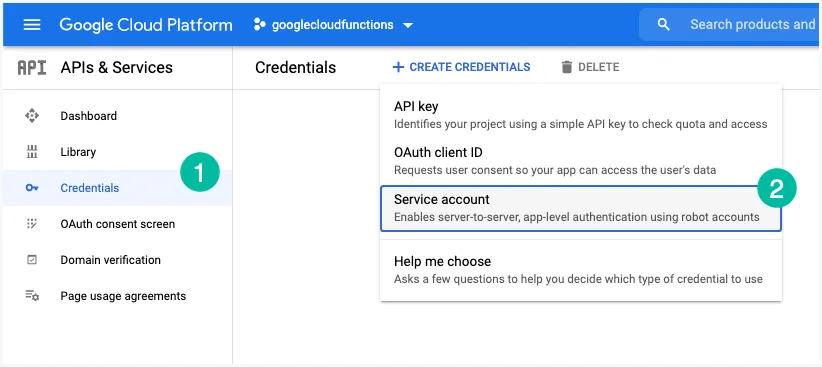
Go to console.cloud.google.com and create a new Google Cloud project. While the project is selected, go to APIs & Services > Credentials > Create credentials and select Service Account.
Give your service account a name and grant the Project > Owner role to the service account.
Your service account will have an email address like <project-id>-<service-account-name>@<project-id>.iam.gserviceaccount.com.
Related: Use Service Accounts with Apps Script
Create a Service Account Key
In the Google Cloud Console, click the email address for the service account that you have created in the preview step. Click Keys > Add Key > Create new key. A JSON file will be downloaded to your computer. Make sure you add this file to the .gitignore file as it contains the private key and should not be committed to the repository.
You can also pass the authentication credentials to the cloud function by setting the environment variable GOOGLE_APPLICATION_CREDENTIALS to the path of the JSON file.
export GOOGLE_APPLICATION_CREDENTIALS="/path/to/service-account.json"Enable the Google Cloud APIs
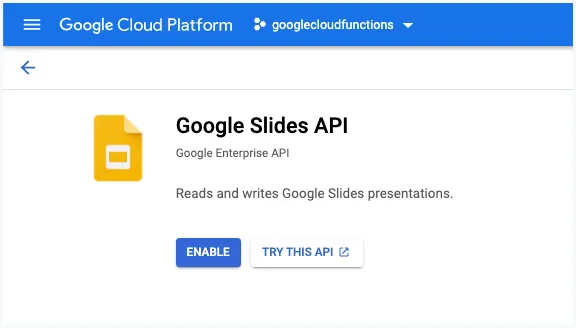
Go to APIs & Services > Library and enable the Google Slides API and the Google Drive API for your cloud project.
Create a Google Slides Template
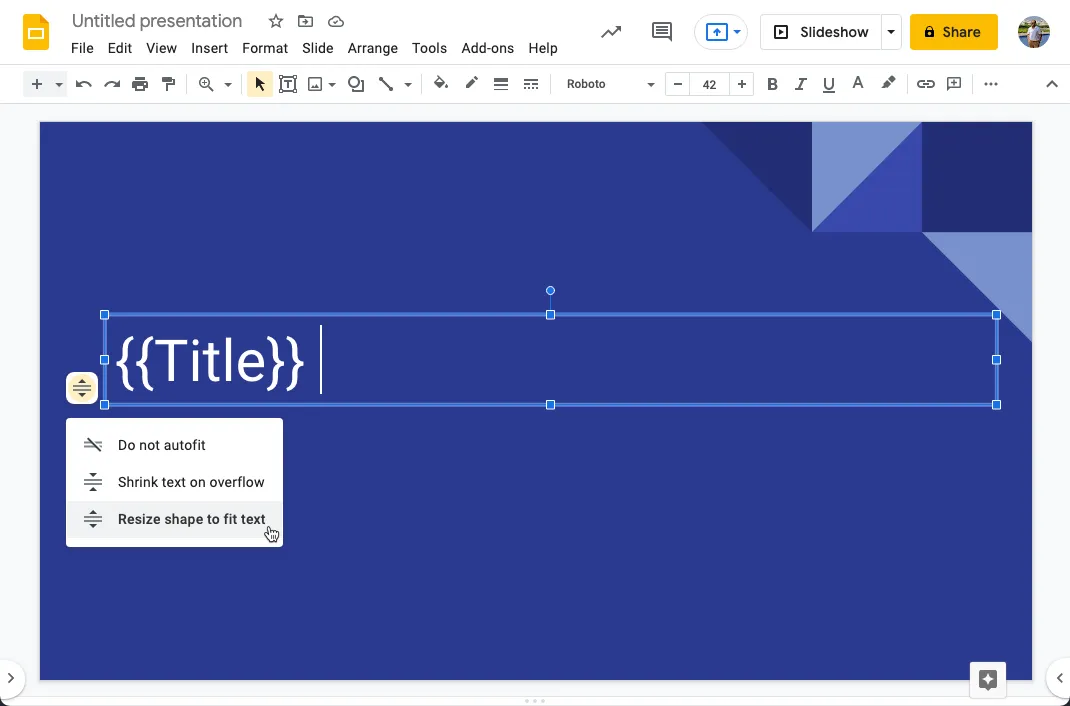
Go to Google Slides and create a new presentation containing a single slide. Add a text box containing the text {{TITLE}} and ensure that the Resize shape to fit text option is checked since we may have a long title as well.
Add the service account email as an editor to the Google Slides presentation.
Create a Google Drive Folder
Create a new folder in your Google Drive and share it with the service account email. This folder will be used to store the slide templates that are used to generate the open graph images.
Make a note of the ID of the folder and the Slides template created in the previous step.
Create a Cloud Storage Bucket
Switch to Google Cloud Storage and create a new bucket for storing the generated images. Please note that billing must be enabled in your Google Cloud project for using this feature.
Write the Google Cloud Function
Initialize a new project in your local disk with the npm init command and add the code to the index.js file. We create our own signed JWT from the service account’s private key and then exchange the JWT for an Access Token to authenticate the Google APIs.
const fetch = require('node-fetch');
const { google } = require('googleapis');
const { client_email, private_key } = require('./creds.json');
const { Storage } = require('@google-cloud/storage');

const { client_email, private_key } = require('./creds.json');
const jwtClient = new google.auth.JWT(client_email, null, private_key, [
  'https://www.googleapis.com/auth/drive',
  'https://www.googleapis.com/auth/presentations'
]);

const slides = google.slides({ version: 'v1', auth: jwtClient });
const drive = google.drive({ version: 'v3', auth: jwtClient });

const CLOUD_STORAGE_BUCKET = 'BUCKET_NAME_GOES_HERE';
const FOLDER_ID = 'DRIVE_FOLDER_ID_GOES_HERE';
const PRESENTATION_ID = 'PRESENTATION_ID_GOES_HERE';

const createOgImage = async (fileName, replaceText) => {
  const { data: { id: presentationId } = {} } = await drive.files.copy({
    fileId: PRESENTATION_ID,
    fields: 'id',
    requestBody: { name: fileName, parents: [FOLDER_ID] }
  });

  await slides.presentations.batchUpdate({
    presentationId,
    requestBody: {
      requests: [
        {
          replaceAllText: {
            replaceText,
            containsText: { matchCase: false, text: '{{TITLE}}' }
          }
        }
      ]
    }
  });

  const { data = {} } = await slides.presentations.get({
    presentationId,
    fields: 'slides/objectId'
  });

  const { data: { contentUrl } = {} } = await slides.presentations.pages.getThumbnail({
    presentationId,
    pageObjectId: data.slides[0].objectId
  });

  const response = await fetch(contentUrl);
  const arrayBuffer = await response.arrayBuffer();
  const buffer = Buffer.from(arrayBuffer);
  await drive.files.delete({ fileId: presentationId });
  return buffer;
};

const generateImagesAPI = async (req, res) => {
  const storage = new Storage();
  const bucket = storage.bucket(CLOUD_STORAGE_BUCKET);
  const text = req.query.text;
  const fileName = `${text.replace(/\s/g, '-').toLowerCase()}.png`;
  const file = bucket.file(fileName);
  const [fileExists] = await file.exists();
  if (fileExists === false) {
    const buffer = await createOgImage(fileName, text);
    await file.save(buffer, {
      resumable: false,
      contentType: 'image/png',
      public: true
    });
    await file.makePublic();
  }
  const fileLink = `${storage.apiEndpoint}/${CLOUD_STORAGE_BUCKET}/${fileName}`;
  res.set('Cache-Control', 'public, max-age=86400, s-maxage=86400');
  return res.redirect(fileLink);
};

module.exports = generateImagesAPI;
Deploy the cloud function
If you are using Firebase, you can deploy the function using the firebase deploy --only functions command.
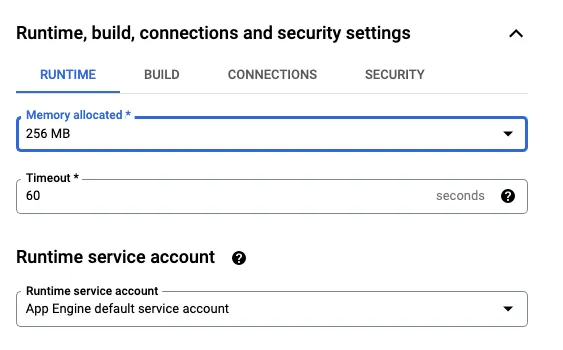
After the function is deployed, go to the Google Cloud Console > Cloud Function and edit your function. Expand the Runtime, build, connections and security section and reduce the memory allocation from 256MB to 128MB. You may also reduce the timeout to sometime like 30s since it is not a very resource intensive function.