How to Create Forms that Allow File Uploads to Google Drive
Learn how to build file upload forms for Google Drive and receive large files from anyone. The form respondent does not have to be signed in to their Google accounts
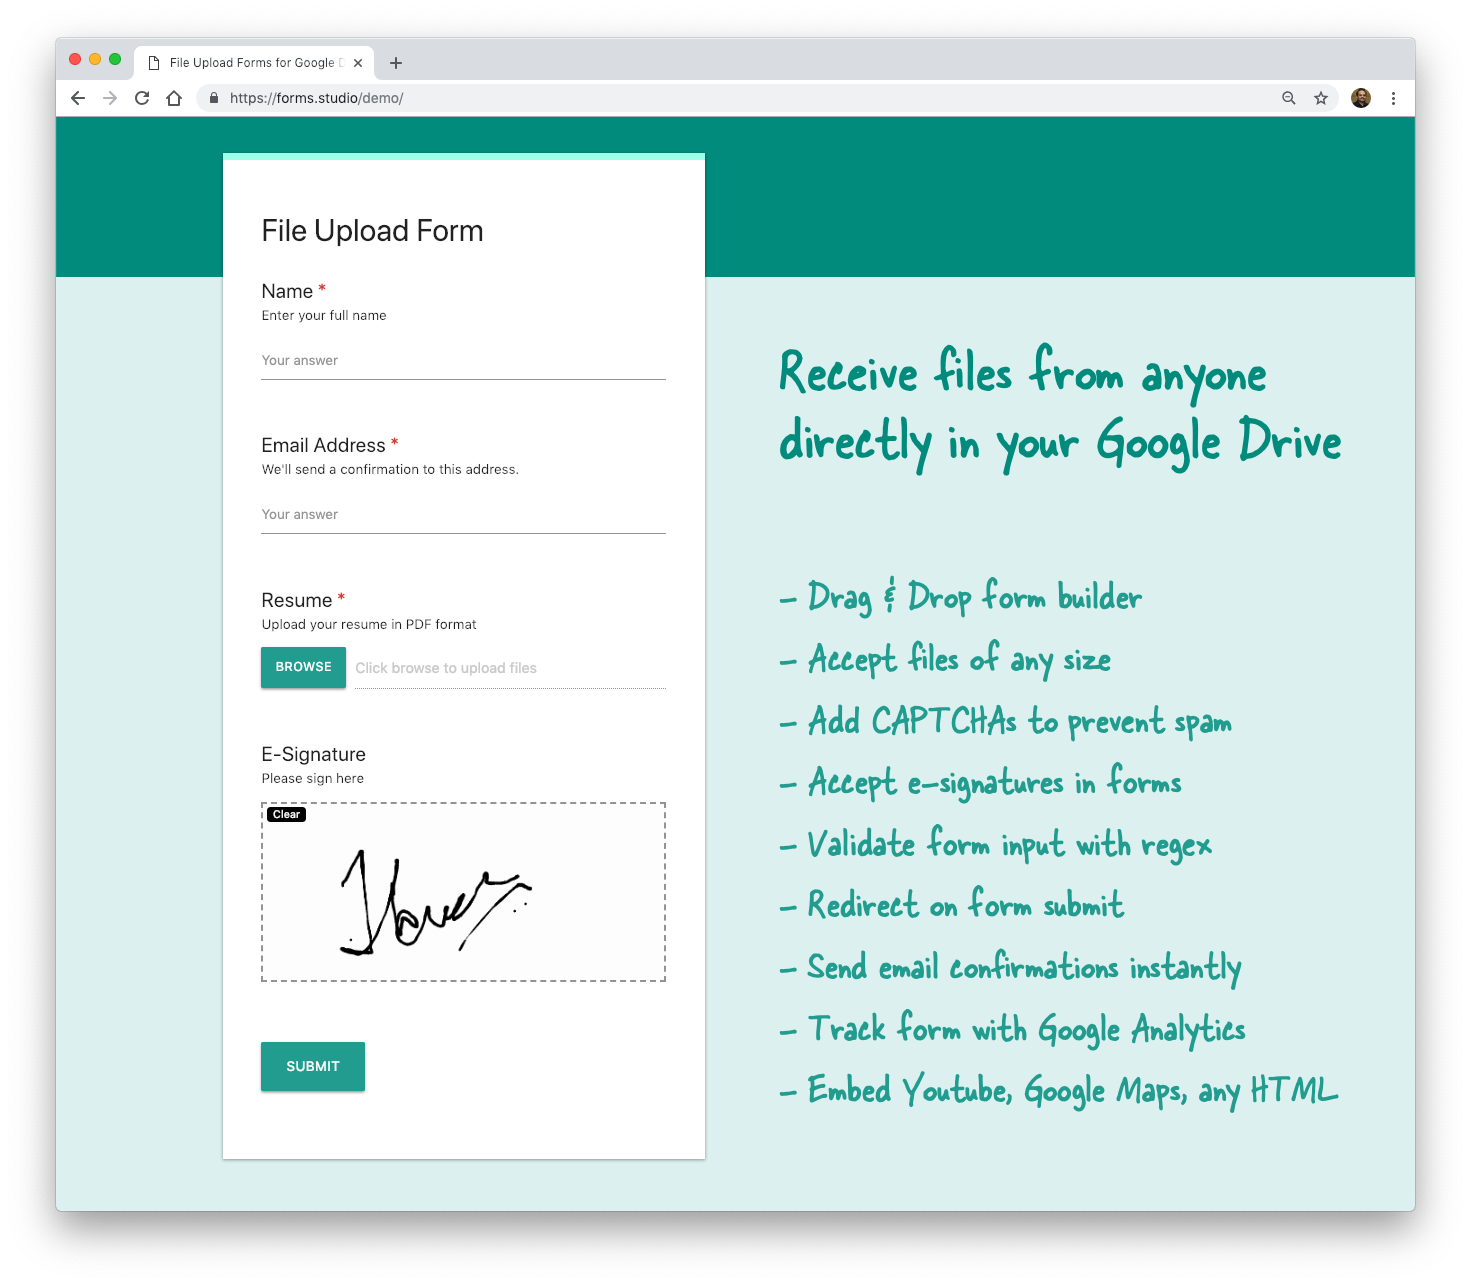
With File Upload Forms (form demo) for Google Sheets, you can receive large files of any size from anyone directly in your Google Drive. You can automatically send email confirmations to notify the form submitter. The forms can be created inside Google Sheets using the built-in drag-n-drop form builder and the forms can have CAPTCHAs, collect e-signatures, multiple file uploads, password protection and more.
Unlike the file uploads feature in Google Forms, the form respondents do not require a Google account to uploads files through your form.
Receive Files from Anyone in Google Drive
A school teacher may want to build forms for students to upload assignments and the files are automatically saved to her Google Drive but in separate student folders. The HR team may want an online form where job applicants can upload their resumes in PDF or Word format. Business can build forms with eSignatures that respondents can sign on their desktops and mobile phones.
Google Forms do allow file uploads but the respondents need to be signed into their Google accounts before they can upload files. File Upload Forms impose no such limitations - anyone can upload files to your Google Drive. They may not have a Google account and they’ll still be able to use your Drive upload forms.
File Upload Forms - Getting Started
Here’s a step-by-step guide on how you can build your own File Upload Forms in a few minutes. Or watch the YouTube video to get started.
Step 1. Copy the Google Sheet for File Upload Forms
The File Upload Form is written in Google Scripts and the code needs to be attached to your Google Sheet for it to work.
To get started, go to forms.studio/copy and click the “Copy” button to create a copy of the Google Sheet template to your Google Drive. This sheet includes the form builder, email designer and it will also be storing your form responses just like Google Forms responses are stored inside Google Sheets.
Step 2. Deploy the form as Web App
Inside your Google Spreadsheet, go to `Tools -> Script Editor to open the Google Script editor. Don’t worry, you don’t have to write a single line of code, you only have to deploy this script as a web app so anyone can access your form via a simple web URL.
Go to Publish -> Deploy as Web App, choose Me under Execute the app as, choose Anyone, even Anonymous under Who has access to the web app and click the Deploy button.
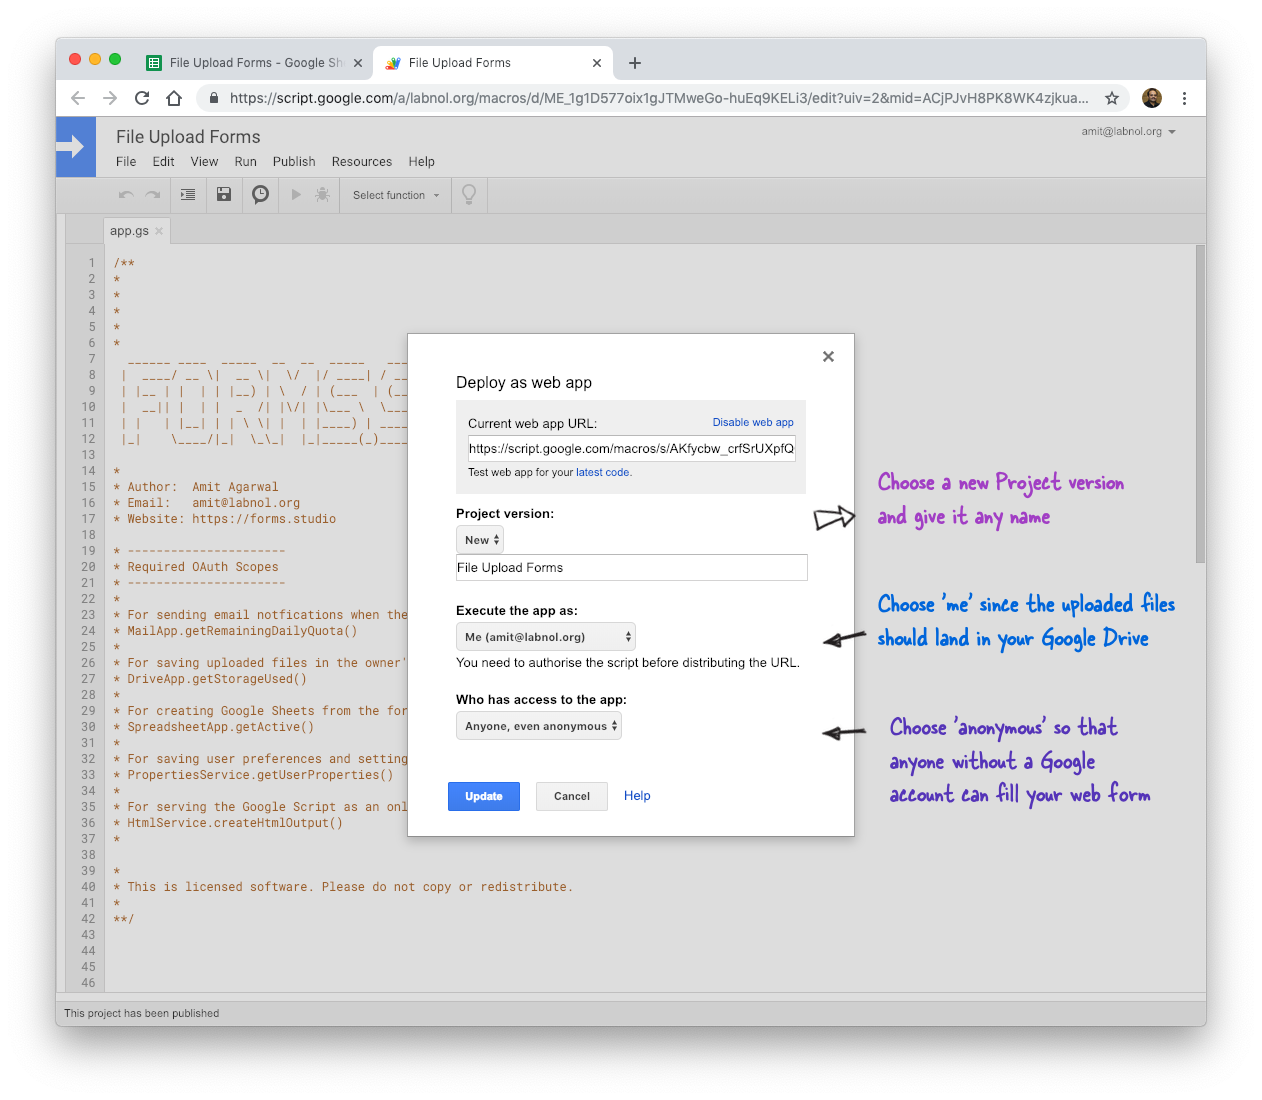
You may have to authorize the script once since it has to do all the operations - like sending emails, uploading files - on your behalf.
Also, if you get the “App Not Verified” screen, just click on the Advanced link and choose “Go to File Upload Forms” to continue. While this step is optional, you can submit your app to Google for verification and they’ll drop the ‘not verified’ warning.
Step 3. Design the File Upload Form
Switch to the Google Sheet, expand the File Upload Forms menu (near Help) and choose Edit Form. It will launch a simple but powerful drag-n-drop form builder right inside your Google Sheets.
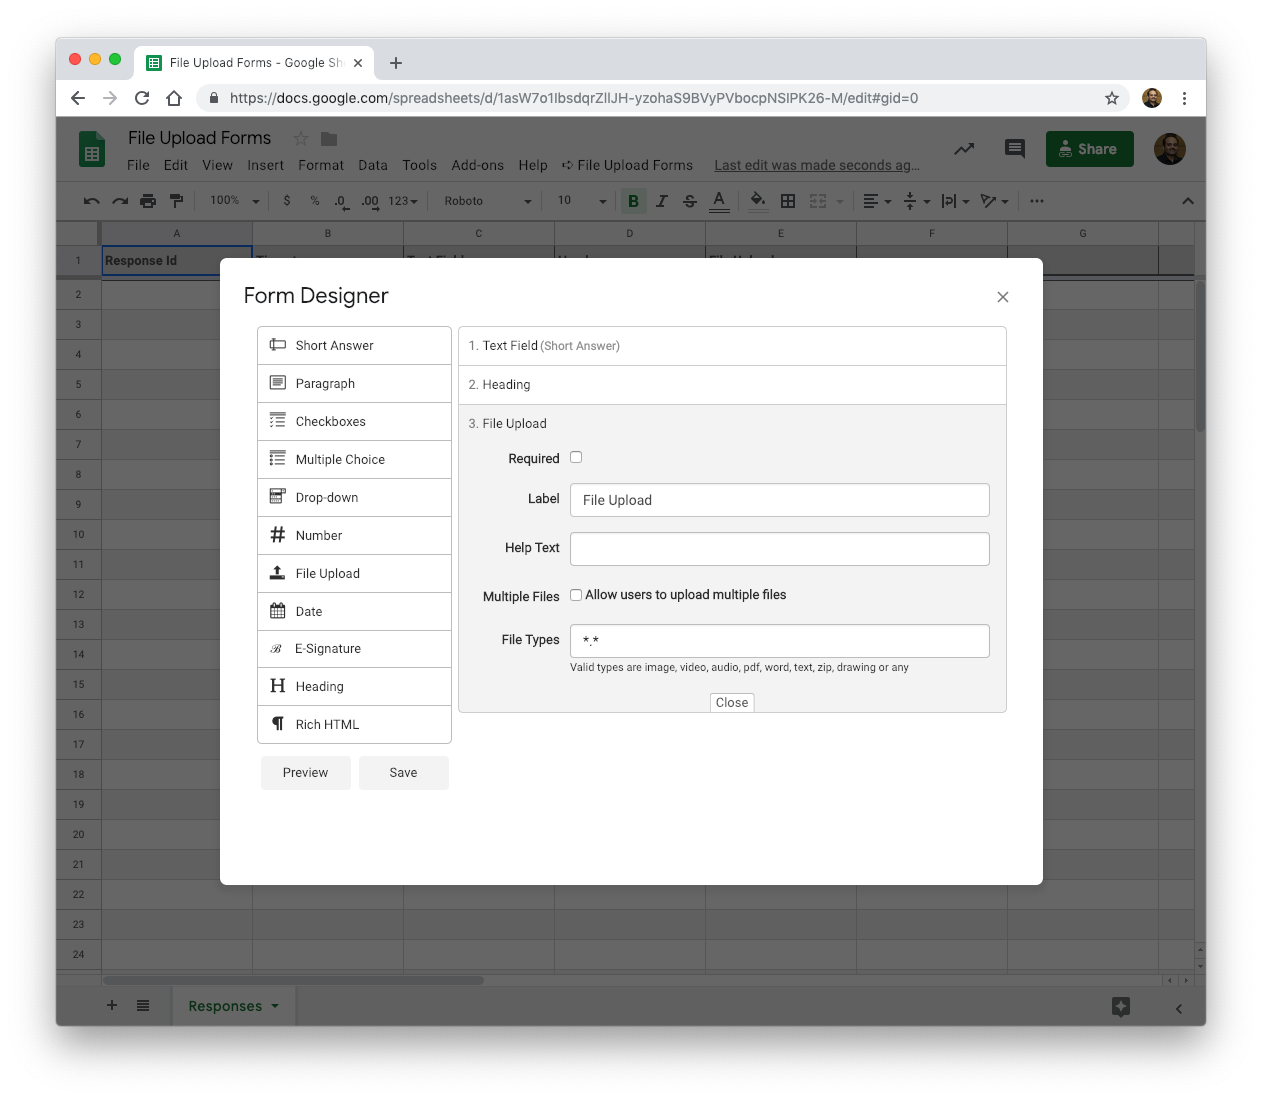
Your forms can have multiple file upload fields, eSignatures, date, time picker, and all the standard form fields. Use the Rich HTML field to embed YouTube videos, Google Maps, SoundCloud MP3s, Google Slide presentations, Images or any HTML content.
You can also add data validation rules to various form fields using simple regular expressions. The file upload fields can be configured to accept single or multiple files. You can also limit uploads to specific file extensions like images, videos, zip, and more.
Step 4. Customize the Form’s Settings
After your form is designed, go back to the File Upload Forms menu and choose Configure Form. It will open a sidebar in your Google Sheet where you can customize the form and Google Drive settings.
The confirmation message can include place-markers - form fields enclosed inside double curly braces like {{name}} - for personalized messages. You can also place a URL inside the Redirect After Submit field and respondents would be redirected to that website after submitting the form.
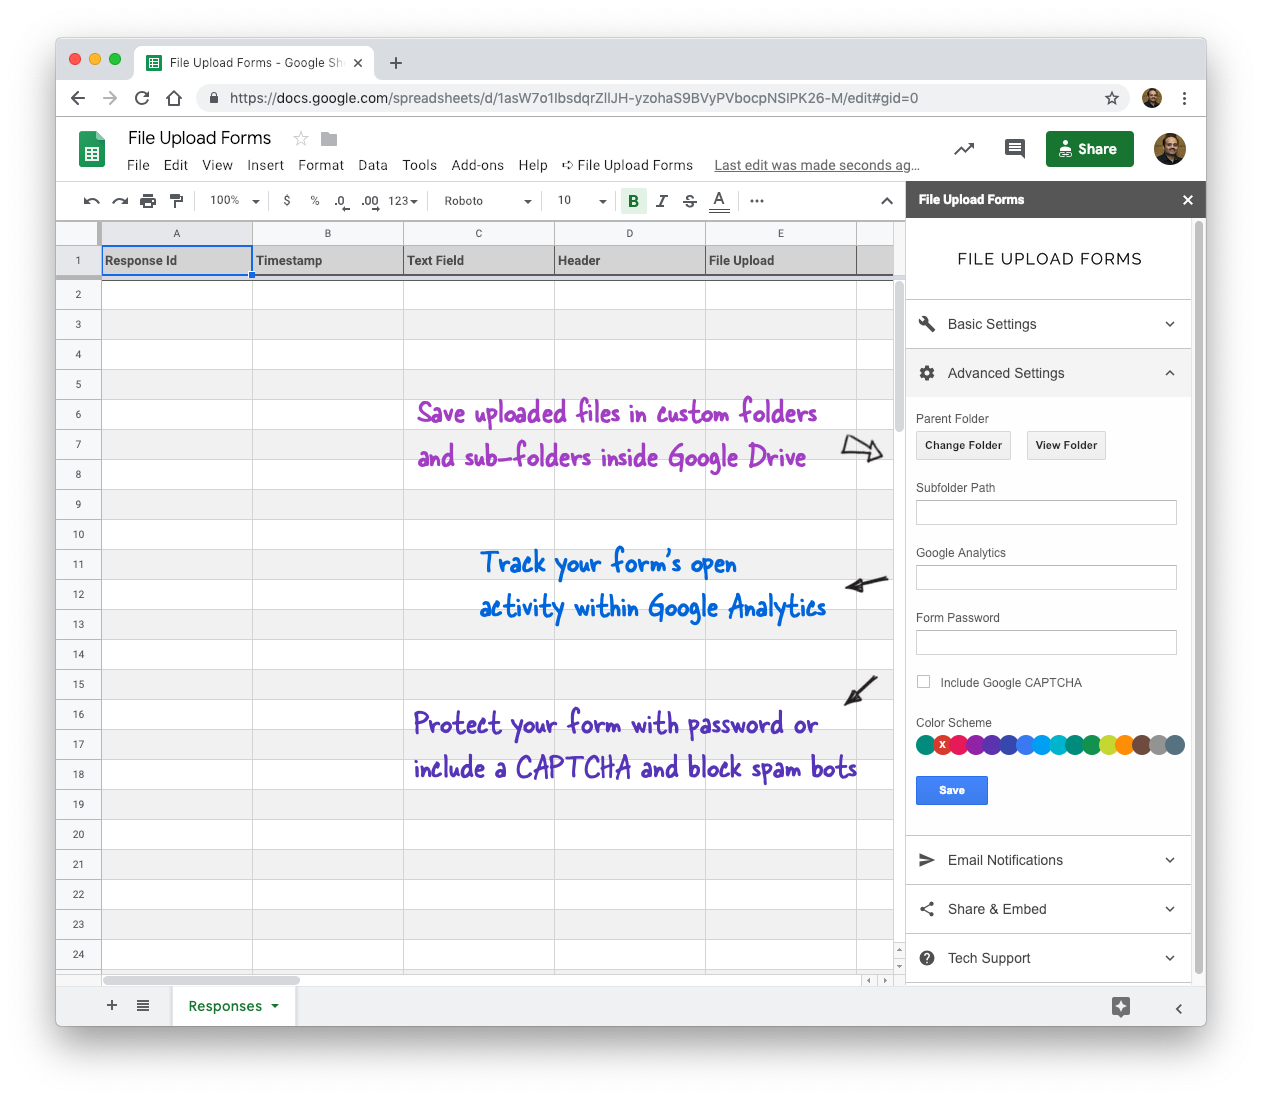
In the advanced settings section, click the Select Folder button to choose the parent folder in your Google Drive where all the files would be saved. You can also specify a sub-folder path for storing files and this path can be dynamic - \\{{Country}}\\{{City}} - based on form answers.
You can also change color schemes, track visits to your form with Google Analytics and protect your forms with Google CAPTCHA and passwords.
Step 5. Send Confirmation Emails
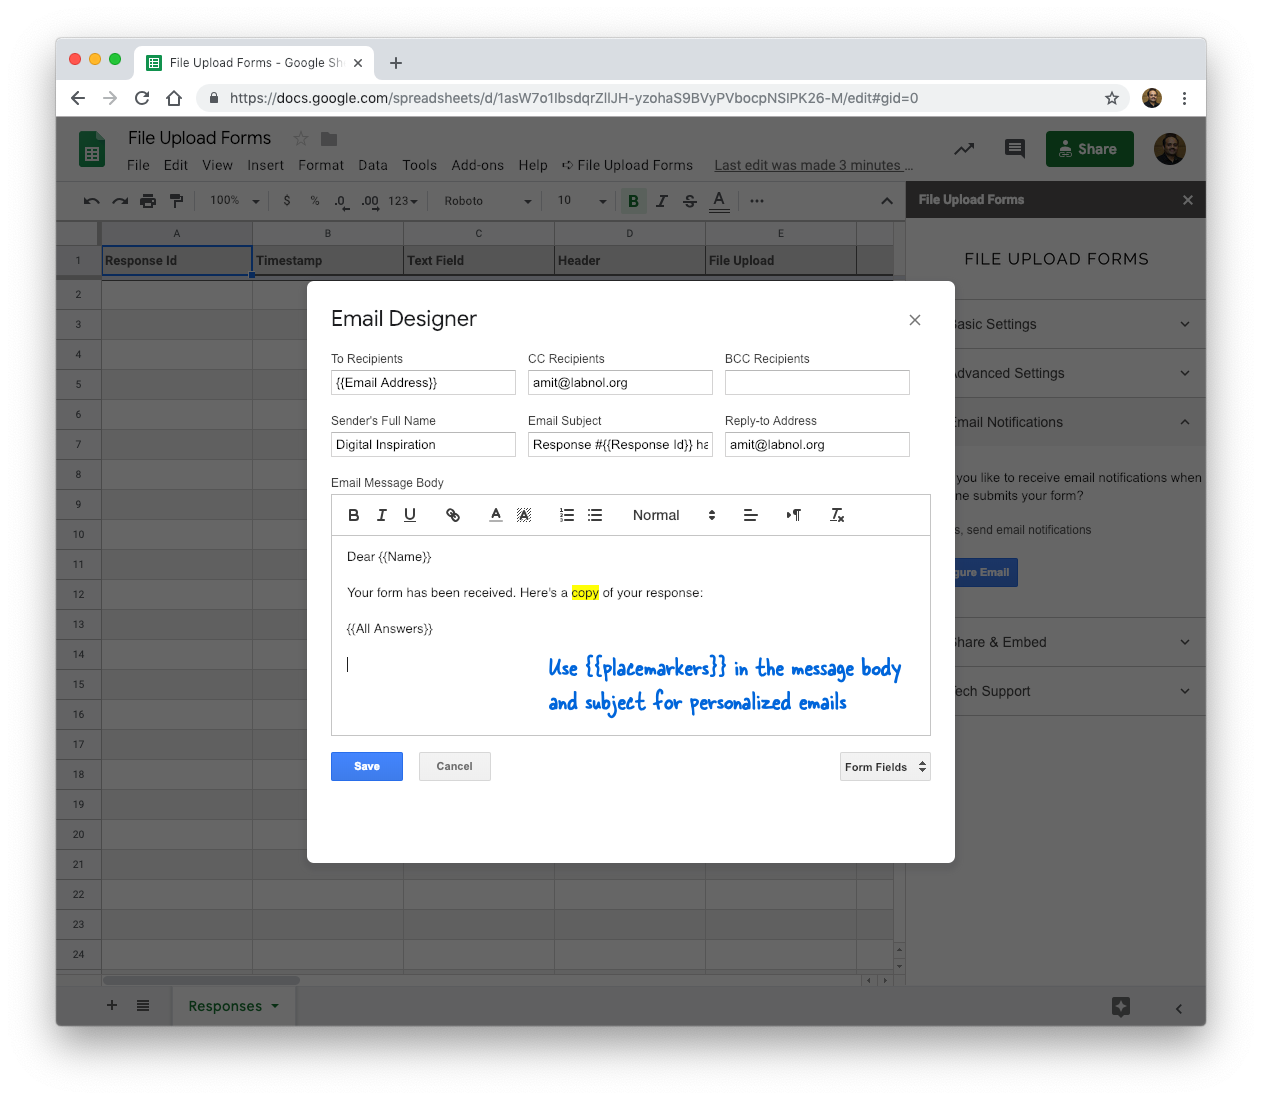
With File Upload Forms, you can send email notifications when people submit the form. The emails can be personalized by including the form fields in the email subject and message body.
Use the special {{All Answers}} place marker in the message body to include a summary of the form response in a neat table. The TO, CC or BCC field can include the {{question title}} where you ask for the email address and it will be replaced with the actual value in the form response.
That’s it.
Your form is now ready for the world. Expand the Share section and you’ll be given the URL to directly access the form and also the embed code for adding that form to any website.
You can use Gmail Mail Merge to send the form link to all your contacts in a personalized email. The Document Studio add-on can help you create beautiful, pixel-perfect PDFs from the form response and they are auto-saved in Google Drive.
Things to Know - File Upload Forms
- To stop accepting new responses, go to Publish -> Deploy as web app menu and click the Disable link.
- If you wish to restrict the forms to users inside your organization, choose your Google Workspace domain under Who has access to the app in place of Anonymous.
File Upload Forms - Compare Plans
Please visit the product page to compare features of the Enterprise and Standard editions. File Upload Forms for Google Drive require a license for extended use.

Amit Agarwal
Google Developer Expert, Google Cloud Champion
Amit Agarwal is a Google Developer Expert in Google Workspace and Google Apps Script. He holds an engineering degree in Computer Science (I.I.T.) and is the first professional blogger in India.
Amit has developed several popular Google add-ons including Mail Merge for Gmail and Document Studio. Read more on Lifehacker and YourStory